Monday, October 30, 2006
So, lately I've been digging in to my WIP's. I am trying so hard not to start anything new until I get some things finished, especially things for other people. But I did do one new thing over the weekend. It's a really cute cabledy bag. I like cables in small doses. Anyway there was a pattern I found a while back on www.knittingpatterncentral.com for a clutch/purse. It only used one skein on lion brand landscapes, so this weekend when I saw some on sale I bought one. Turns out that pattern disappeared and I was left with one lonely skein. I went and got another and it turned out like this instead. It's not anything really different but it came out cute.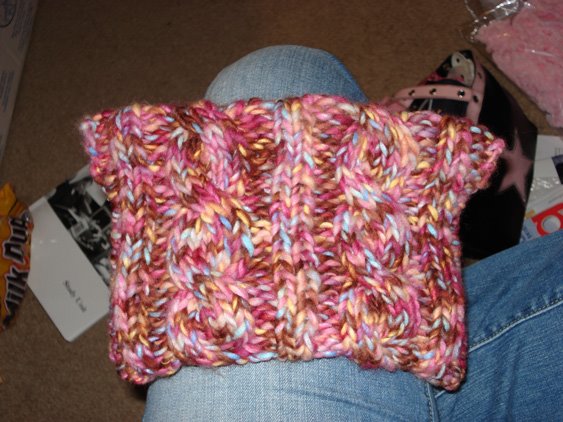
Here's how I did it.
I cast on 32 stitches on size 11 needles and worked four rows of stockinette.
Then I started doing these two rows repeating with a c6f on the fourth row and each 8th row after that:
1. K3, p2, k3, p6, k2, p2, k2, p6, k2, p2, k3
2. P3, k2, p2, k6, p2, k2, p2, k6, p2, k2, p3.
The cable rows go like this:
P3, k2, p2, c6f (slip 3 stitches on cable or extra needle, hold in front, knit next three stitches and then knit the three on the cable needle),
p2, k2, p2, c6f, p2, k2, p3.
I didn't think about this until afterward but if you want you can do a k1 selvedge stitch on the edges to keep it straight. That's gonna be hidden anyway when you seam it up.
You will do this until you have 8 cable crossing rows. When you do that last c6f row you will do four more rows in pattern and then do four stockinette rows to match the beginning. Then bind off on the next row. So you will end up with a long rectangle. 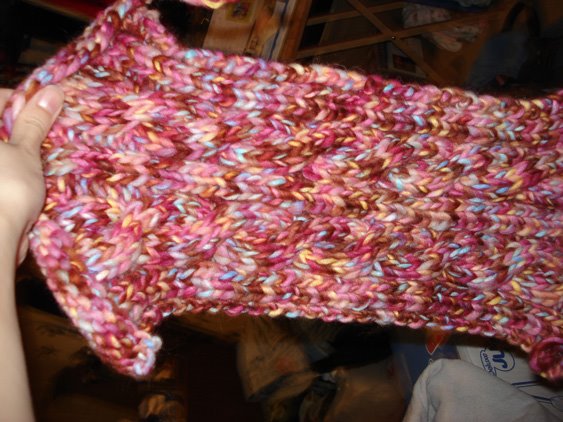
I went and bought some magnetic snaps to close my purse up and attached them on the right side in the center k2 of the purse on each end.
Then I sewed the stockinette rows down so the snaps were inside. 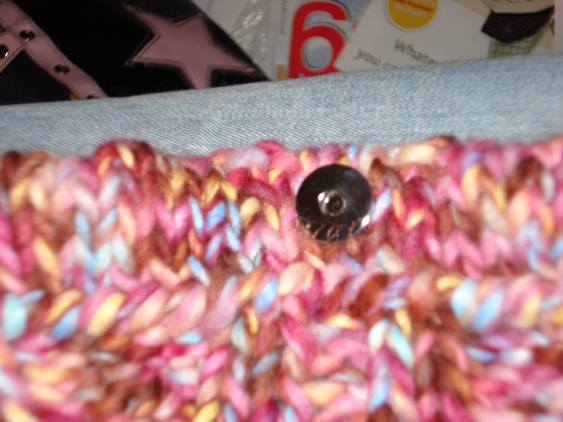
Do this any way you want. I did a sort of whipstitch. I also left the ends open so the top is sort of a tube, I think I'm gonna paint some wooden dowels to put in there. JoAnns sells them and also wooden balls to go on the ends. Anyhow then you seam up the sides with the right sides together, you want the seam inside! I went up to the edge of the inside flaps so the ends of the top were left open to slide those dowels in.
You can leave the purse like that or you can do what I did and make a lining for it. I used about a 12 x 12 inch square for mine and hemmed all the edges. Then I sewed up the sides to make it like a pocket. To sew it to the purse:
Turn purse inside out and fit the lining over it with the lining's right side out. Sew around to attach. I used the ridge from sewing the top flaps down so the thread wouldn't show on the outside of the purse and went around twice to make it extra secure. You do it any way you like! I also followed the stitching from when I hemmed the lining to keep it neat. 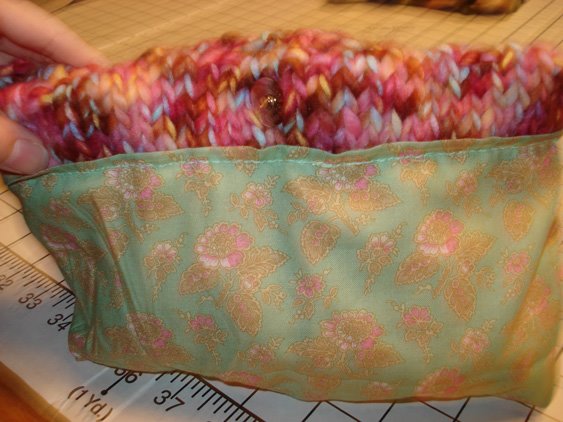
So then you are pretty much done. I'm still debating a handle or dowels. If you don't want the dowels I recommend sewing up the sides completely, it looks neater.
So if there are any questions please let me know. I typed this kinda fast, I might have missed something!

4 comments:
Just want to tell you how cute this clutch is! Great job!
Cute purse! I'm going to make one myself. No self-respecting knitter can wear a store-bought purse ;o)
I really like this idea but I just started and I think it will be to hard for me. I'm going to try any way.
It's a very cool and cute purse and you should be proud of it♥♥
Post a Comment